Monday, November 23, 2009

Tarnish-Free Silver with NO WORK!

I love silver jewelry.
But the silver that I don't wear everyday gets tarnished really fast because the air here is so humid!
Lots of jewelry is really hard to polish because chains and other intricate items are impossible to reach inside the nooks and crannies.

Grandma didn't go out and spend a bunch of money on chemical silver cleaner!
She would sit for hours and buff it to a glorious shine....
Until she found this great tip to "NO WORK" Tarnish-Free Silver!

Here we go!


What You'll need...

a glass baking dish.
aluminum foil big enough to line the baking dish.
steaming HOT water to fill the foil lined baking dish.
Salt
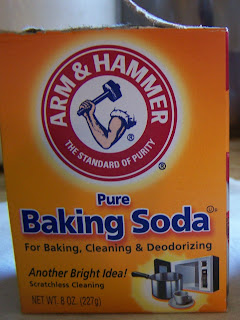
Baking Soda.
Tarnished silver.


Here are some of my tarnished silver pieces.

Line your baking dish with aluminum foil. Fill your foil lined baking dish with steaming hot water.
Add 2-3 teaspoons Salt
&
2-3 teaspoons Baking Soda.
and give it a little stir to dissolve the salt.
add your silver into the solution.


You want your silver pieces to be touching each-other
And touching the foil.


Let your silver soak in the salt/baking soda solution for about 5 minutes.
If you watch closely you can actually see the tarnish leave your silver!!

After soaking, remove your silver... rinse it off..
dry it (you can buff it to a high shine if you want)
and look at the tarnish free silver!!

See how purty and sparkly it is now?
and I didn't even get my hands dirty!

Thanks Grandma!

  • Be careful use this cleaning solution on jewelry that include gems. Especially porous gems like pearls or turquoise could be damaged by the liquid.

  • Be careful when polishing or dipping silver plated items. Any damage or imperfection in the plating could allow the liquid to attack the base metal underneath. The plated silver would look shiny and clean, but could be weakened on the inside.


  • Wearing your silver jewelry will keep it free from tarnish.

Go forth and clean your silver!!


Sunday, November 22, 2009

Welcome!

Welcome to Stuff Grandma Made!!

Our Grandmothers were purdy darn smart!
They were thrifty,
They were great cooks,
They were resourceful,
They sprinkled everything with love,

They didn't run out and buy prepared foods! They actually baked and cooked from scratch!

They didn't have 30 different chemicals under their kitchen sinks...
But no ones house was cleaner!

They could sew.
They could can.
They could make even the simplest tasks special.

Lets remember these special ladies....
Lets keep their traditions and way of life going!

Who Knows? We may just learn something!

Swiss Steak with Onion Gravy


This is comfort Food at it's best!

Incredibly tender beef in a flavorful gravy... perfect for sopping up with a nice crusty bread, or drizzling over mashed potatoes , rice or noodles.

Swiss Steak with Onion Gravy

SERVES 4 -6

  • 1 1/2-2 lbs round steaks
  • 1 cup flour
  • salt & pepper to taste
  • 3-4 tablespoons oil
  • 1 large onion, sliced
  • 2 garlic cloves, crushed
  • 2-3 cups beef broth (or beef bullion dissolved in water)
  1. Cut round steak into 6 serving size pieces.
  2. On a cutting board, dredge pieces with flour, salt and pepper.
  3. Pound flour into the meat with a meat mallet.
  4. Turn pieces, dredge, and pound until they can't hold any more flour.
  5. **TIP** put the flour and steak in a large Zip-Lock bag... it saves so much time and mess!
  6. In a large non-stick skillet, heat oil and brown steak pieces on both sides.
  7. Place in a casserole dish. (with a lid or use foil)
  8. Add onions and garlic to the skillet.
  9. Saute until onions are limp.
  10. Spread onions and garlic over steak pieces in casserole dish.
  11. Add enough beef broth to barely cover meat.
  12. Bake, covered, at 300F for 2 hours or until fork-tender.
  13. Serve over noodles, rice or mashed potatoes.
  14. Enjoy!

Stuff Grandma Made © 2008 Por *Templates para Você*